Good Headshots vs. Bad Headshots: The Key Differences
Joseph West • March, 2024
You refresh your resume, craft a stellar cover letter, but one element can make or break your application: your headshot. Separating the professional from the amateur is all in the details. Let's dive into the key differences between a headshot that gets you noticed and one that gets skipped over.
STUDIO POD
Imagine you've spent months crafting the perfect resume, honing your interview skills, and preparing for your dream job. Finally, the moment arrives. You click "submit" on your application, and... silence. Weeks later, you receive a polite rejection email with the dreaded line: "We received a high volume of applications..."
What went wrong? It could be your resume, your experience, or even something as seemingly insignificant as your headshot.
Your headshot is your digital handshake, and in today's competitive world, a bad one can be the kiss of death.
Decoding the Difference: Good Headshots vs. Bad Headshots
Let's delve into the key differences between good and bad headshots:
Lighting
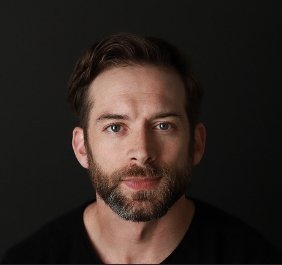
Good: Imagine a gentle, diffused light illuminating your face, similar to a window on a cloudy day. This flatters your features, minimizing harsh shadows and creating a natural look that draws viewers in.
Bad: Harsh flash photography casts unflattering shadows and washes out your skin tone, leaving you looking like a startled deer in headlights. Avoid this at all costs!
Background
Good: Think serene studio setting with a clean, neutral backdrop. This keeps the focus squarely on you, allowing your personality to shine through without distractions.
Bad: A cluttered or busy background, like your messy living room, draws attention away from your face and creates an unprofessional impression.
Clothing
Good: Choose professional attire that reflects your industry and personal brand. Opt for timeless elegance in solid colors or subtle patterns that complement your skin tone and hair color.
Bad: Ripped jeans, stained shirts, or overly casual clothing scream unprofessionalism. Similarly, wearing loud colors or busy patterns clashes with the background and detracts from your image. Ditch the weekend wear and choose attire that conveys professionalism.
Pose & Expression
Good: Stand tall with relaxed shoulders and make direct eye contact with the camera. This exudes confidence, trustworthiness, and engagement. A genuine smile adds a touch of approachability, making you appear friendly and open.
Bad: Crossed arms, hunched shoulders, or a tilted head portray insecurity and discomfort. Avoid forced smiles or awkward poses that make you look stiff or unapproachable. Remember, first impressions matter, so project confidence and approachability.
Authenticity
Good: Embrace your natural beauty. Excessive editing or filters that distort your features are a big no-no. You want to be remembered for who you are, not a digital avatar. Be natural and genuine, not airbrushed to perfection.
Bad: Using an outdated headshot that doesn't reflect your current appearance is misleading and unprofessional. Similarly, excessive editing that smoothens wrinkles or alters your features creates a false impression. Be authentic and use a recent, accurate headshot.
Technical Quality
Good: A high-resolution image that's clear, in focus, and properly cropped. Ensure your headshot meets the size and resolution requirements for where you'll be using it.
Bad: Blurry, pixelated photos taken with a phone camera or cropped too tightly. Avoid using filters or excessive editing that removes your natural features.
Professional vs. DIY
While DIY headshots are tempting, a professional photographer can make all the difference. They have the experience and equipment to create a flattering image that captures your personality and professionalism.
Common Headshot Mistakes
As seen from the examples I’ve brought, even with good intentions, some common mistakes can sabotage an otherwise decent headshot. Here's how to avoid them:
Outdated Photos: Your headshot should be a fresh snapshot of your current self. Ideally, update it every 1-2 years to reflect your professional image and any significant changes in appearance.
Using filters or excessive editing: Resist the urge to pile on filters or excessive editing. A professional headshot should showcase the real you in a polished light.
Camera Flash Faux Pas: Using a camera flash directly on your face can create red-eye and harsh shadows. Bounce the flash off a wall or ceiling for a softer effect.
Cropping Catastrophes: Ensure your headshot is properly cropped to frame your face and shoulders appropriately. Avoid awkwardly tight crops or excessive headroom.
Benefits of Studio Pod for Getting a Good Headshot
To avoid taking a bad headshot, consider Studio Pod. It eliminates common pitfalls like awkward poses, harsh lighting, and distracting backgrounds. Additionally, Studio Pod doesn’t require a photographer so you can solely concentrate on taking your perfect headshot. With its guided interface and affordable price point ($50 per session), Studio Pod helps you achieve a professional and polished headshot in minutes.

Joseph West, a co-founder of Studio Pod, leverages his extensive experience in photography to provide professional headshot services. Through Studio Pod, he shares his insights and expertise in the photography industry, underscoring his commitment to the photography industry.


